

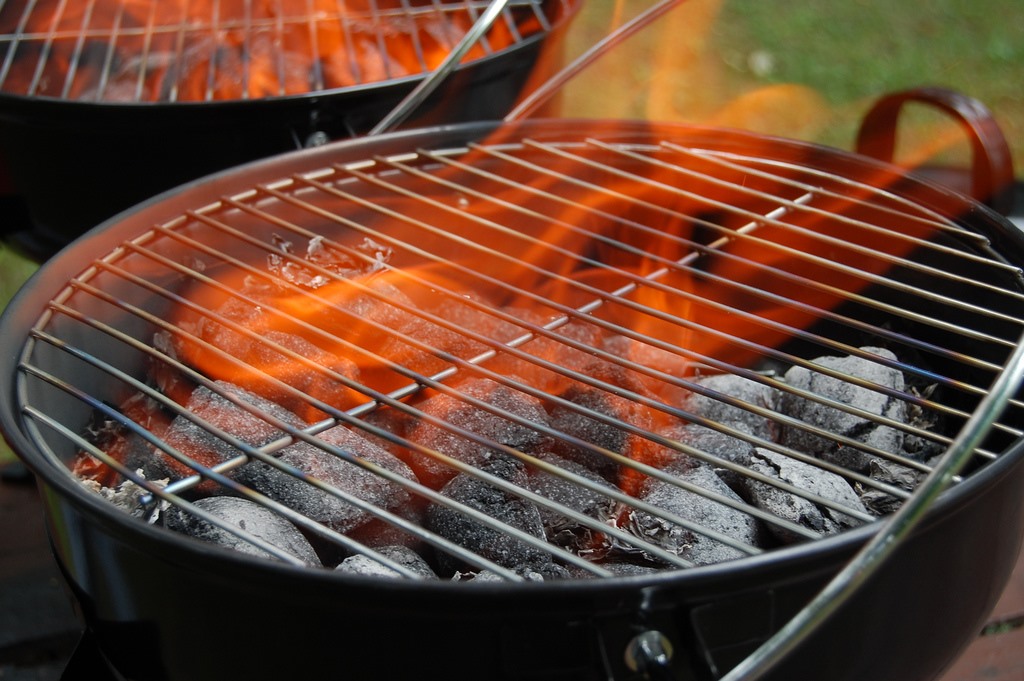
 Fire. It's everywhere— always has been. From the Ordovician Period where the first fossil record of fire appears to the present day everyday uses of the Holocene. Today, we abundantly create flames (intentionally or unintentionally) in power plants, extractive metallurgy, incendiary bombs, combustion engines, controlled burns, wildfires, fireplaces, campfires, grills, candles, gas stoves and ovens, matches, cigarettes, and the list goes on...

Yet with our societies' prodigal use of fire, the importance and power of it remains taken for granted. Only those who find themselves in dangerous situations will learn to fully appreciate a burning flame— shipwrecked passengers, lost hikers, and maybe even stranded motorists will at one point need a fire, either for warmth or for food. But what if the predicament is even more life-threatening than being stranded or lost?

 Sooner or later, zombies are going to invade this world, and the only thing you can do to stay warm and full is to build a fire, but that will attract them, right? Okay, so zombies aren't the most realistic scenario. But how about Ugandans and the Congolese people fearing for their lives under constant rebel attacks? Fires are necessary for living, but an obvious indication of population, whereas some would rather remain hidden. An even more realistic survival scenario is a soldier left to fend for himself behind enemy lines.
If you are (or were) a soldier in the United States military, you probably know how to build a fire, or at least know how to start one. Maybe you don't (I've come across many soldiers who knew nothing of basic survival skills), but nonetheless, the Army deemed it necessary to include a fire-building skills section in their U.S. Army Survival Field Manual (FM 21-76) and the Ranger Handbook (SH 21-76). If you're headed to a war zone like Iraq or Afghanistan in the near future (or are already there), whether a soldier, contractor, or civilian, you need to know this stuff.
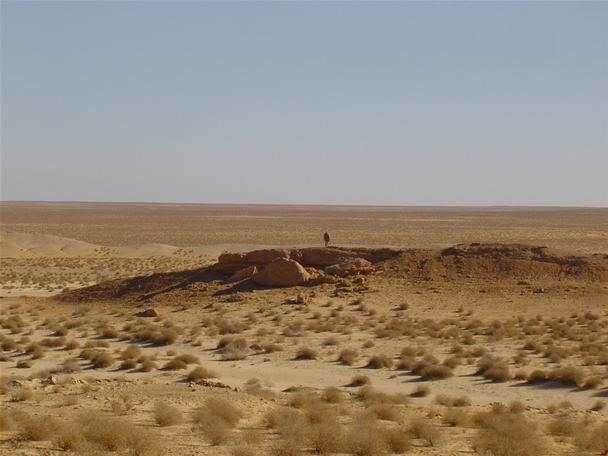
There's always that slim possibility that you could be left alone in the arid deserts of Iraq or Afghanistan to fend for yourself. Your convoy could be hit, leaving you the lone survivor, or you could simply be forgotten about. It happens more than you think, especially when immediate action is needed— and amidst the chaos, your fellow combatants are driving off without you, leaving nothing but sand in your face.
However you should be left alone, and however permanent it is, building a Dakota fire pit is an essential piece of information for you to know. It's a really simple process, which makes it easy to remember and easy to make. You might need it to cook food, to heat water, or to simply stay warm, and yes— it does get cold in Iraq and Afghanistan, contrary to popular belief.
In some parts of Iraq, it can reach below zero degrees Celsius during the winter months. So, what if there was that slight chance that you were to get stuck in the middle of the desert alone in the cold? During the day it stays pretty warm, but what about at night? The Dakota fire hole is the best option for averting a cold weather injury.
The Dakota fire hole is also your best option to avoid detection from enemy personnel. The flames are hidden below ground, and the fire burns hotter, producing less smoke for enemy eyes. An underground fireplace is the absolute best tactical option, especially at night— you never know if an insurgent might possess night vision capabilities. Concealment is a soldier's best friend (right next to his weapon).
This fire pit is not only for military personnel, but also for anyone looking to build a decent or concealed campfire. It's great for any environment, jungle or desert, except maybe Antarctica or Alaska. There's additional information below, like firing starting and location picking, but if you want to get right down to it, just head to the pit building section.
General Fire Knowledge
FIRE LIGHTING METHODS
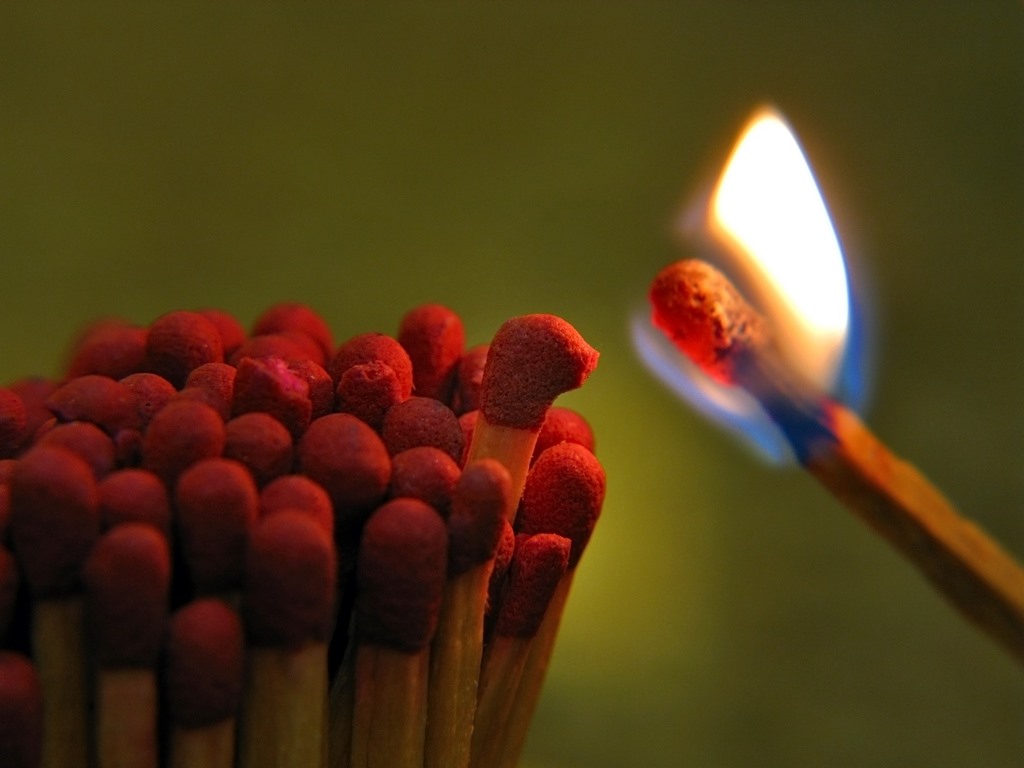
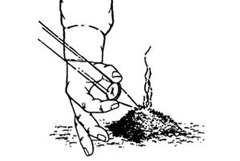
First off, before you actually make the fire pit, you're going to have to learn how light a fire. Most soldiers smoke cigarettes while deployed to Iraq and Afghanistan; it's one of the many pleasures they can still enjoy on a day-to-day basis. Even if they aren't smokers, they probably smoke because it gives them something to do, which means they probably have a lighter or a pack of matches on them. If you're not one of those types, you might not carry such items. But you should always consider carrying waterproof matches in remote areas. Standard MRE's come with one matchbook, so there should never be a reason not to have a pack or two.
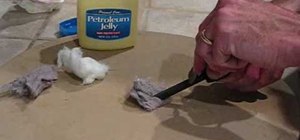
 If you have signal mirror on you, you can try and light a fire with that. God knows the sun is strong enough in the deserts of the Middle East to get one started. Also, if you wear glasses, use one of the convex lenses with the sun to get it going.
An obvious alternative to lighters, matches, and the sun is what you carry around with you everyday, if you're a solder that is— ammunition. You can extract the gunpowder from one of your 5.56 rounds (or whatever round you are packing) and use it as tinder. Just make sure you're careful when removing the bullet from the shell casing. All you need is one good spark to ignite the gunpowder, and then it's fire!
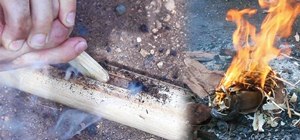
Other ways to start fires include hand drilling techniques, bowing methods, flint and steel, a magnesium striker, battery and steel wool, and the fire-plow (friction).
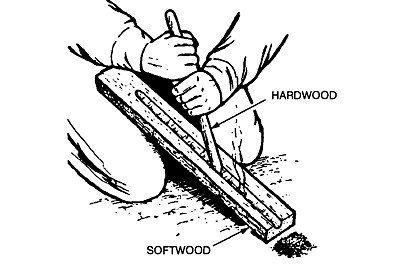
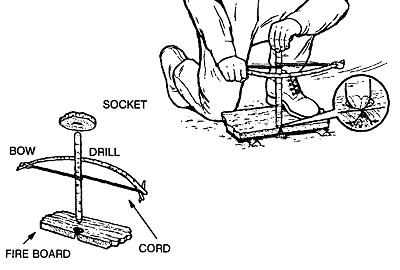
Check out the videos below for some demonstrations of different fire starting techniques.
LOCATION SCOUTING
When picking a location, there are a number of things to consider, like why you actually need one, how much time you have, and enemy proximity. The Dakota fire hole is your best option when the enemy is close by, but it's also good for areas near dense population. Locals always seem to pop up in the strangest places!
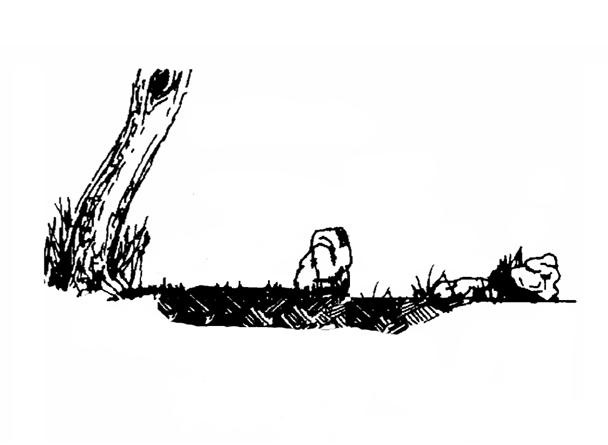
Make sure you find a dry spot (which shouldn't be too hard), hidden well from enemy eyes. Stay away from areas with harsh winds and don't build fires next to obvious hazards, such as bushes and shrubs, because it doesn't take much to make a fire spread in the intense Iraq heat. Make sure you clear all of this brush away, or just avoid it. Scrape the surface of your designated spot for debris, and make sure you have at least three feet in diameter to contain the fire.
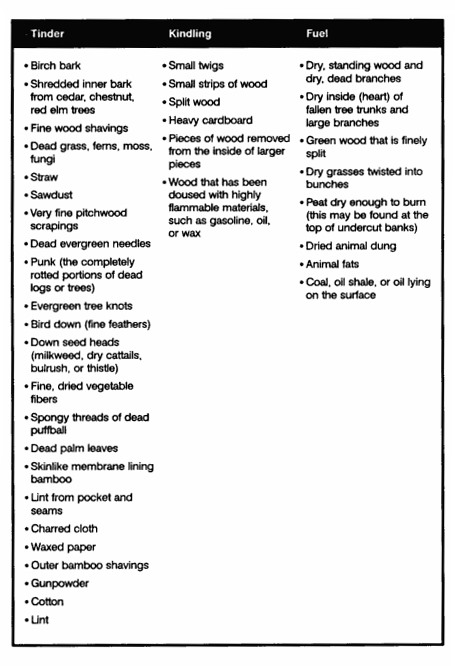
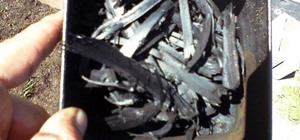
If you have built a shelter, make sure the fire area is adequately placed in relation to the shelter. And get a spot that concentrates the heat from the fire in your desired direction. You'll also want to place the pit where a good supply of wood or other fire burning material is available. There is a lot of animal dung laying around in Iraq and Afghanistan, so that's an obvious source of fuel. Below is a list of other common tinder, kindling and fuel that can be used for materials.
In Iraq and Afghanistan, the soil is usually full of humus and clay, cursed with high saline content, or simply sand. Some of these soils can be hard to dig without a shovel or other digging equipment. Sand is the easiest to dig into with your hands, but most likely won't provide the sturdiness needed for the Dakota fire pit. Stay away from rocky areas to, because it will be hard and time-consuming to dig. If any of the soil is wet, it will definitely be hard to dig out. Also, appearances can be deceiving; after a rainfall, weeks after even, the soil underneath the top soil will still be completely wet, while the top soil is absolutely dry because of the intense heat from the sun.
WHY THE DAKOTA FIRE PIT?
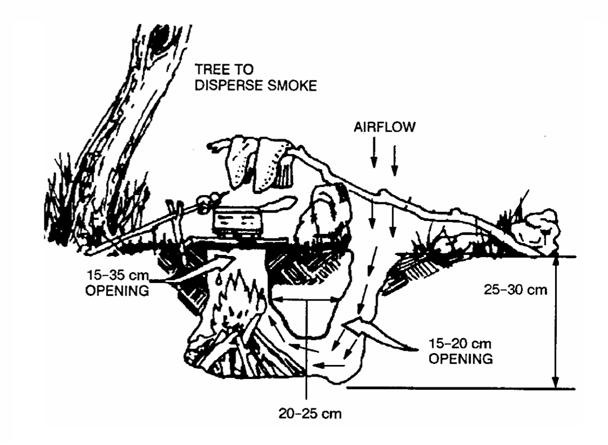
First off, the Dakota fire pit is the only option for staying tactical. It's the only campfire you can build where the flames remain invisible. Also, the fire burns so hot that it reduces the smoke output, which is optimal for avoiding detection.
The fire remains hot and burns steadily because of the chimney and airway tunnel. When the fire burns in the main pit it forces all of the hot air out the chimney, allowing no air in from that hole. The resulting effect is that it creates a suction-like action that forces fresh air down the airway tunnel to the fire base, feeding the fire with plenty of oxygen. If you position the airway tunnel on the upwind side of the main hole, it forces even more fresh air down to the fire. Also, as the fire gets hotter, it sucks more oxygen down the tunnel, making the fire even hotter.
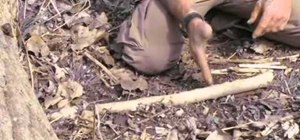
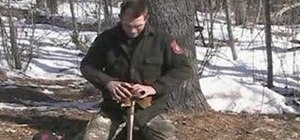
Building the Dakota Fire Hole
Before you actually start, you'll need something to dig with. Most soldiers are issued the standard military E-Tool compact shovel, but nearly all of them won't carry it out on a mission because they're overloaded with water and ammunition. If you don't mind the extra weight, by all means, bring it along for emergencies. More than likely, you'll have nothing with you except maybe a knife, so use that. Also, look around for materials to dig with, like a large stick. You can even use your collapsible buttstock on your M4 by detaching it. But the easiest way is to probably just use your hands, if the soil isn't that tough. Or at least start with your hands.
Step 1 The Right Spot
The biggest thing to worry about is enemy proximity. For more details, see the above Location Scouting section.
Step 2 The Main Pit
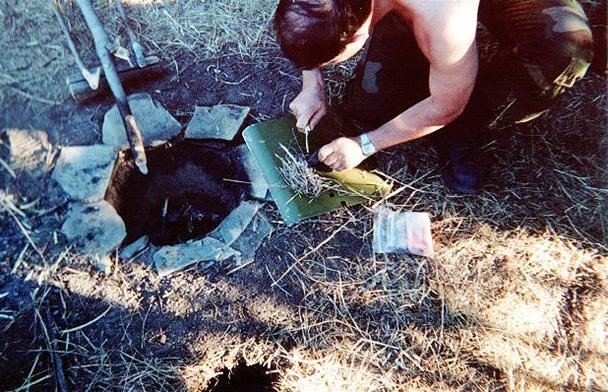
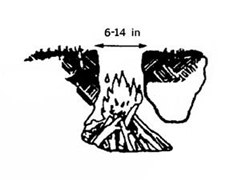 Make sure the pit area is clear before you start digging. First, plot out the diameter of the fire pit chamber, which should be between 6 and 14 inches. If you plan on cleaning the area before you leave, leaving it exactly as you left it to avoid detection, then cut the top layer of soil and save the plug for replacement later. Most likely, you won't need to save a plug for later, because it's mostly just sand or clay.
As the top layer should be between 6 and 14 inches, the actual pit below can be larger to accommodate larger firewood or other burning material. This also allows the fire to be larger and hotter, and provide less smoke, acting much like a chimney.
Step 3 The Airflow Hole
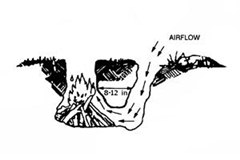 Digging a thinner hole on the upwind side of the actual fire pit provides ventilation for the fire. Starting at about 8 to 12 inches from the edge of the fire pit, begin your airway hole. This hole should be slightly smaller in size than the main pit, and will need to be dug at a slight angle to intersect with the base of the fire pit chamber.
Make sure that the airflow hole is on the proper side of the main pit. The side from which the wind is blowing toward the main pit is the side on which the airway tunnel should be constructed. This hole is important in keeping your fire burning, providing it with adequate oxygen, so make sure it is in the right place.
Step 4 Fill with Kindling
Start shaping your kindling in the pit, but make sure not to overload it. You'll need some room to work with when starting the fire.
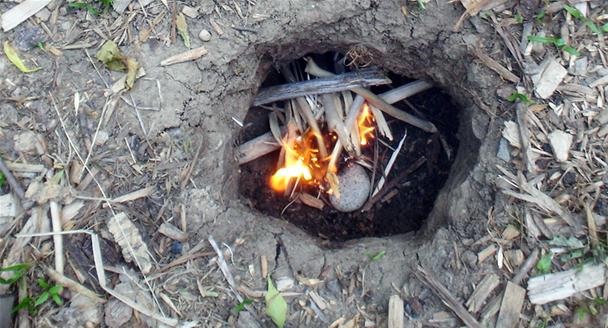
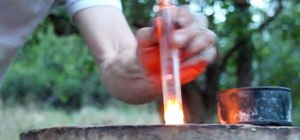
Step 5 Light the Fire
Once your kindling is in place, you'll need to get the actual flame ready. Gather up your tinder and light it with your matches, your lighter, or whatever method you can as described above in Fire Lighting Methods. Once you have a flame or ember going, light the tinder and place it in the main fire pit to light the kindling.
Once the kindling is burning, you'll need to constantly maintain the fire, because of its small size. Make sure you have a good supply of kindling and fuel around to gradually add to the fire when necessary.
Step 6 Fire Purpose
Depending on what purpose you have in mind for your fire, you'll have to construct it to that need.
A. Warmth
In cold areas, specifically at nighttime, staying warm is the only thing that may keep you on the tip of your toes. No additional building is needed to simply stay warm. Just the fire itself and you're good.
B. Food
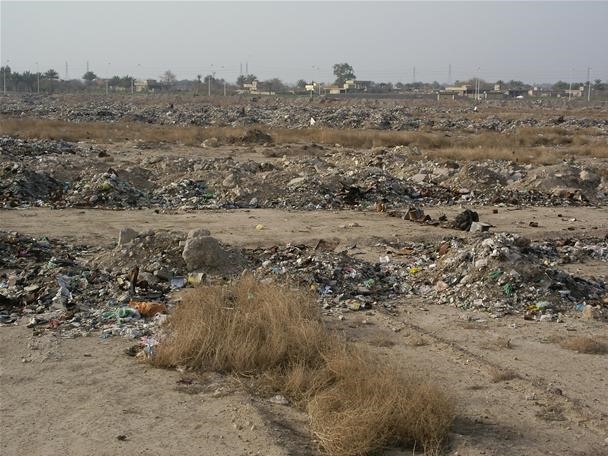
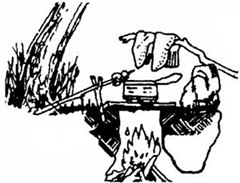 If the fire is specifically for cooking, then I suggest simply adding a few green sticks parallel to each other across the hole. You can then use your canteen cup (if you have one) as a pan, or you can find a small flat rock (not big enough to cover the hole) to use as a makeshift frying pan. Some areas of Iraq, mostly the outskirts of cities, are covered in trash and junk.
Simply find some metal rods or equivalent items, like wire strands to use across your fire instead of the green sticks. Use the sticks for roasting rods or fuel for the fire.
C. Water
If you are simply trying to boil water for safer drinking, or for that MRE hot cocoa pouch that's wasting away in your assault pack, then do the same as Step B above, only use your canteen cup for the water. If you don't have the canteen cup, you're going to have to search for something similar around you, like junk tin or a soda can.
Step 7 Camouflage
This could be an unnecessary step for most people, especially if you're in the desert and there isn't exactly anyway of hiding. But when close to enemy territory, which is most of Iraq, you'll want to consider cover and concealment. It's a simple as using your surroundings to blend in. The fire pit in itself is underground, specifically for concealment, so you have to worry more about yourself that the fire.
Step 8 Security
For situations where you need to distinguish the fire immediately to avoid detection, have a good pile of sand or similar soil beside the fire at all times. Simply drop the sand in until the fire is no more. It's that easy. Just DON'T use water. The water will create unnecessary smoke that will cause more harm than good.
Step 9 Cleanup
To cover your tracks, make sure you tear down the pit and return it exactly how you found it. Refill the hole and cover the top with the plug cut out from earlier. If you don't have a plug, just do your best to mask it with its surroundings. Return all unused fire materials to where you found them, or pack them up and take them along with you for future use.
Just make sure you are being evasive and tactical for you cleanup. I know I would be taking every possible step to avoid any encounter with unfriendlies, so make sure you do it right.
There are plenty of other alterations you can make to this underground fire pit, like placing stones around the pit to help hold the heat, but this is the general layout. It's not too difficult to make, with the main pit and airway tunnel being the main compartments. All of the other things, like concealment and cooking grill are optional, but may be necessary if the wilds of Iraq and Afghanistan, or maybe even in your own backyard.
Just updated your iPhone? You'll find new emoji, enhanced security, podcast transcripts, Apple Cash virtual numbers, and other useful features. There are even new additions hidden within Safari. Find out what's new and changed on your iPhone with the iOS 17.4 update.


2 Comments
Thanks this was very helpful. I cant wait to try it out!
The Dakota pit fire reminds me of the new fan-angled rocket stove . The upwind component would be key it seems. Can't wait to test the technique ina week or so at rainbow. Wood selection of soft non resin bearing woods make better ashes for the fire drill the video makes look easy.
Share Your Thoughts